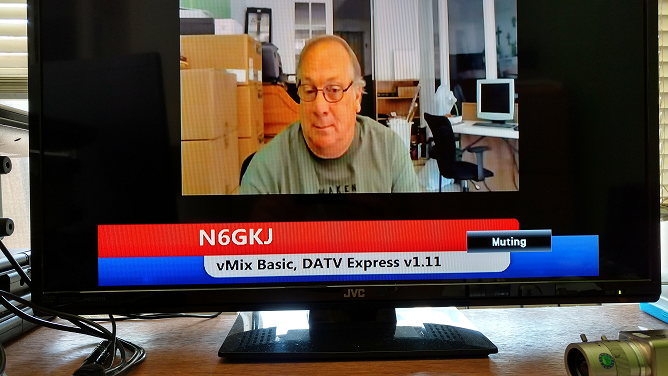
Tested settings used on my DATV Express Transmitter
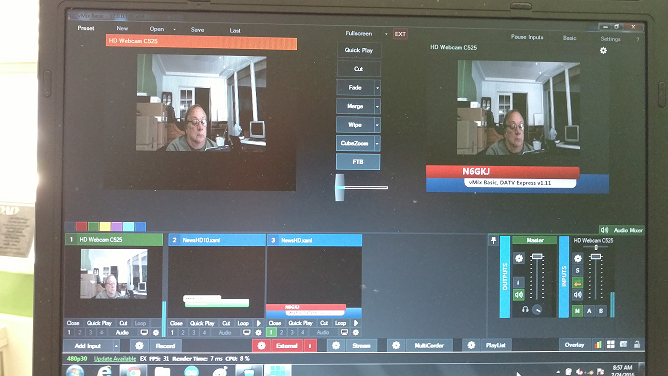
This is a poor picture of the vMix workspace
Use these exact settings for vMix
Use these exact settings for vMix External
Note: The External button must be selected to transmit video
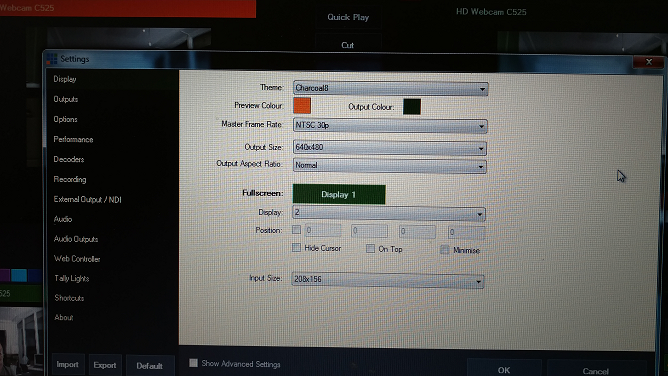
Use the largest setting your copy of vMix will allow.
Notes on my experience with vMix
Here are the specs on my laptop: HP6910p running at 2.0 GHz with 2GB RAM.
I had alot of problems getting this software to work and look decent. I eventually paid the fee for the HD Basic license to get better video quality.
First I was not really clear as too what I was being told on how to use the software. I literally tried every setting possible until I started getting results.
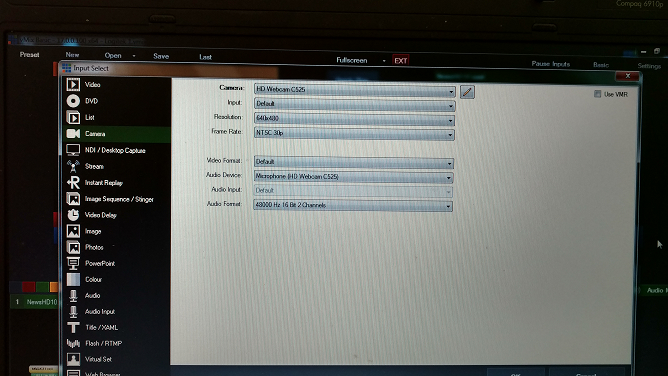
First thing I noticed, the lower my camera input settings were, the fuzzier my picture was. The highest resolution I could run with the FREE copy of vMix
was 640x480 which happens to be the maximum input the vMix Free would allow (I purchased the $60 license). That being said, once I was able to run at full rate
for this camera is 1280x720 30p MJPG I started to get some real results. I set the EXTERNAL SIZE to 640x480 30p uyvy. This seemed to worked the best with
DATV Express Transmitter v1.11 software. Where the issue is what happens to the CPU loading when you try to run a real high EXTERNAL VIDEO capture rate.
My compromise was to run at the lower rate. Bear in mind all these settings are for an HP6910p laptop.
VERY IMPORTANT!! the EXTERNAL BUTTON must be pressed in order for DATV Express software to see the video!!.
I am very satified with the result so far. There is a trade of in video quality when running vMix. I think there is double encoding going on.
When the camera input is selected directly in DATV Express, the video image is very sharp and very clear. I can live with the slightly lower video quality.
I have been playing with the different options such as news banners and multiple cameras. I will have more on using those options...